
Ubuntu Setup Guide - Part I
After you deployed a server from any hyper visor or any cloud service providers like: Linode , Azure .they will give you either the public key or password along with the IP address. The basic thing you will perform is just do:
ssh yourserver@[ip]
Password:*****
And boom you are logged in to your server. In this series, I will be discussing about some steps you have to perform to configure your server so that you can deploy your thing inside it. Below are some basic configurations needed for your ubuntu server after you either purchase or you deploy from hypervisor.
To deploy your system you can use different hypervisors like: Vmware, Redhat Virtualization platform, Proxmox, Windows hyper V. I will prefer Proxmox if you are deploying in home environment. It will allow you to create lightweight LXC containers directly.
Step 1: Update packages
In ubuntu or Debian based systems you can update packages using the command:
sudo apt update && sudo apt upgrade
#or
sudo apt-get update && sudo apt-get upgrade
Based on your package manager you can do both update and upgrade.
sudo apt update: update will refresh the local package and repositories which will ensure that the latest information about available packages and their dependencies
sudo apt upgrade: This will install any available updates to your installed packages.
Why update before upgrade?
If you run “upgrade” before “update” you may miss out on important updates or encounter errors due to outdated package information.
Step 2: Set time zone
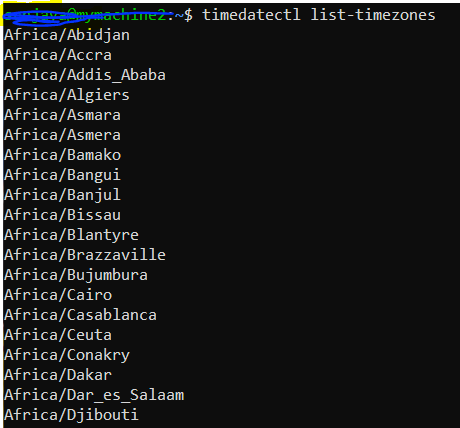
You can set your time zone using timedatectl command in ubuntu. Firstly, you can list available time zones using the command
#view timezones
timedatectl list-timezones
#set your time zone
timedatectl set-timezone "[Your_timeZone_Here]"#Example: Asia/Kathmandu
timezones
Why to set your time zone?
It can lead to discrepancy on time-based applications. Challenging while correlating events from log and compliance requirements are some needs why you need to set correct time zone.
Step 3: Create a user
Generally you are given with root account credentials in many server providers. Allowing root account login via SSH is bad practice, so have to create a new user and disallow root login via SSH config file.
The command we can use to create another user with password is:
adduser [username]
#alternatively you can also user
useradd [username] -m #this option to create user's home directory
passwd username
This command will prompt you to enter user credentials along with the password and name, details, etc.

Why to create another user instead of using root?
As the root account has complete control over the system, and if you by mistake executed something wrong on the system the system may fail and if you lost the root account’s password someone will have full access of your system. So it’s a best practice to create another user with limited and only required privileges. Talking about the authentication method key based authentication is considered to be more secure than password based authentication. So in the coming series I will be explaining about it too.
Step 4: Setup your hostname
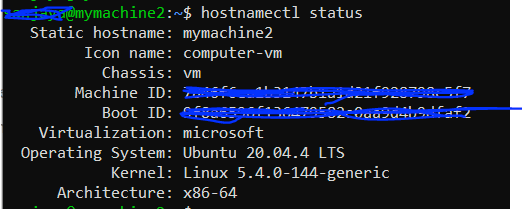
In ubuntu you can set your hostname using the command hostnamectl
hostnamectl set-hostname [hostname]
You can see the changed hostname using the command hostname in your machine. To see the change in bash shell you have to restart the system.
You can also user hostnamectl status command to view the hostname along with other information.
Why to setup your hostname in the system?
It will help you to easily identify your system. Ease of administration, and security purpose. If you see any unauthorized hostname on your network, you will know that there may be a security breach.
In the upcoming series, I will be taking you to configure firewalls, live patching, and fail2ban in detail. Thanks!